Saturday, January 7, 2012

Keep Moving Forward #1

What are your wedding planning plans for the weekend? When Joe and I were planning our wedding, I would definitely need to take a break every once in a while to just relax, sit back, and take some time away from everything wedding. One of my favorite things to do while trying to find down time was to browse through the internet and find funny images or details from around the web. So, kick back those feet, take a breather, and enjoy a few photographs (and a video) before you keep moving forward in your wedding planning.


Photo credits from top left to bottom:
toddler in shark outfit, french bulldog puppy, bandages, ninja turtles, piggy in boots. Video: Charlie bit my finger - again!

Friday, January 6, 2012

Inspiration Board #3: Bow Ties


Joe didn't wear a bow tie for our wedding, but I always wonder how he would have looked. I love the bow tie look in general, and think that it adds a whimsical feel to a wedding. Is the groom in your wedding wearing a bow tie?


Photo credits from left to right: yellow bow tie and vest combo, pug dog in bow tie, checkered yellow bow tie, flask, red and black bow tie.

The Manmade Wedding: Hot Buttered Rum


Every guy out there knows the wedding is for his bride. And for that reason, most wedding sites and blogs you'll stumble upon are for the most part, appropriately geared towards her. Here at The Handmade Wedding, we want toss in a bit of the Y chromosome from time to time, hence The Manmade Wedding column written by the other half of the HMW blog team, Joe Proudman.

Today we're bringing you a drink recipe for Hot Buttered Rum. Unless you're living in Southern California where they just played the Rose Bowl in sunny 80 degree weather, you're just as cold as we are. Hot buttered rum is the perfect drink for those type of nights where no matter how many layers you have on, you're still cold. At any bachelor parties up at a cabin, or camping way up high in the mountains, this would be the best companion you could ask for. Or as you catch the game on a chilly night, while planning your wedding.

So lets get started. You'll need:


Unsalted butter


Brown sugar


Dark rum

The last think you'll need is some boiling water and you're good to go.


The first thing you want to do is put enough brown sugar to cover the bottom of your mug. It goes without saying, the more you put, the sweeter it'll be. It usually amounts to a tablespoon of sugar if I'm making a cup of HBR.


Next you want to pour a bit of water in to melt the sugar.

Toss in the butter next. My general rule of thumb is the same amount of butter as sugar. So about a tablespoon for each cup. As you can see in the photo below, the butter is still melting, but you can already see a light layer of foam forming and a light bronze color in the drink.

Next all you have to do is add about a shot of dark rum, or more depending on how warm you want to be, and you'll be done. It's important to use dark rum. From my experience every time I've asked the a cashier for dark rum they've had a blank look on their face. So just take a look at the label, it'll say dark or black rum. But this is what you'll get:


There are a billion ways to make this drink. A lot of people will add nutmeg, cinnamon, ice cream and whatever else. If you have any recipes for hot buttered rum, or any other warm drink, give a quick run down in the comments.

Thursday, January 5, 2012

Beauty & Fitness: One Sided Braid

I love this one sided braid tutorial on thebeautydepartment.com. It's a cute idea for your bridesmaids or flower girl.

For more beauty ideas from The Beauty Department click here.

Inspiration Board #2: Spots of Blue


I love the combination of white and blue for a winter wedding. If you're still looking for accessories, here are a few that use the color combo wonderfully.


Photo credits from left to right: birdcage bridal veil, garter set, tiffany blue hanky, blue topaz ring, bridal floral belt.

Beauty & Fitness: Honey Oatmeal Mask


Ingredients:
1/2 cup of cooked oatmeal
1/4 cup of honey
1/8 cup of water

To prepare, simply mix all the ingredients into a paste.

What it does:
The mask works for all skin types and not only helps to soften skin, but it can also help with acne by clearing excess oil and clearing pores. It’s simple, yet quite effective. Best of all, you probably already have the ingredients you'll need in your cupboard.

Wednesday, January 4, 2012

DIY Projects: Photobooth Wall


How neat is this photobooth wall DIY idea from Ruffledblog.com? We love the idea of having a photobooth at weddings. It's a fun element that guests can have a blast with, especially if there's mustache props invovled. You can also add a polariod camera to the mix and you've got yourself a great, and unique, guest book idea.


Click here to view the entire DIY process.

Wedding Photography #1


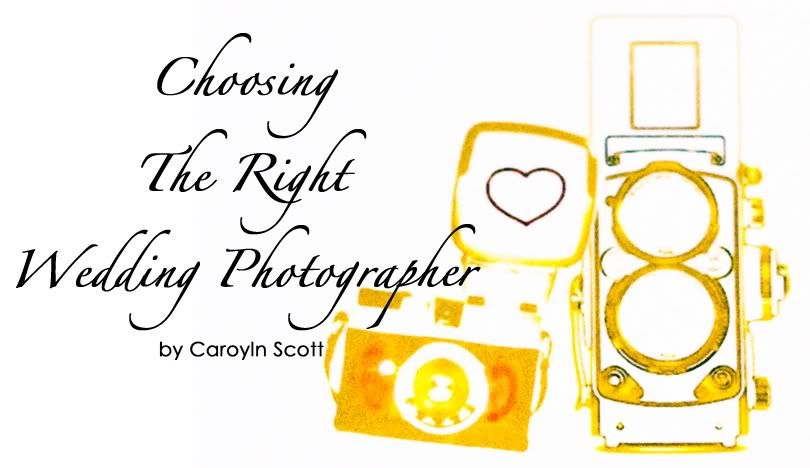
Today we have our first photography segment on the blog by guest writer, Carolyn Scott. We are lucky enough to be working with the talented Raleigh wedding photographer, and this month she has put together for us a list of eight tips to help you choose the right photographer for your big day and other important photography elements to consider.

1. Two main things to choose your photographer based on:

a.) A thorough examination of their portfolio and blog. Visit their portfolio (if they have one) first. These are the pictures that your photographer likes the best. If you don’t jive with their general vision, it’s not going to be a good match. Photographers have a style that they prefer to shoot in. If they’re creative and you ask them to shoot your wedding in a traditional style, your photographer won’t be doing what their best art and you may not be happy with the results. Make sure the pictures that they like the best (the ones in their portfolio) are the types of pictures that you’d like to have for your wedding. After you’ve established that, visit their blog. This is going to give you a much larger sample of their work. You may find that you’re even more in love with them, or that you dislike how they photograph receptions, or that they’ve even improved since updating their portfolio.

b.) Photographers have different styles, and they also have different personalities. Your wedding photographer will probably be the person you spend most of your wedding day with. It is imperative that you like that person and really, truly, get along. If you’re on the same wavelength, you are probably going to be super happy with not only your pictures, but your general treatment throughout the time period of wedding planning and post-wedding picture delivery. Are they going to make you relaxed or nervous? Are they a take-charge type of photographer, or are they the type who asks you for direction, and more importantly – which type do you want? Can you see yourself spending a 10-hour day with this person without wanting to yell/scream/cry?

2. Four main issues to specify in your wedding photography contract:

a. What happens in the event of an emergency and your photographer cannot make it to your wedding?
b. What happens if the film and/or digital negatives get destroyed before I’ve received my pictures?
c. What are the copyright/personal use details?
d. What are the deposit/payment details?

3. The best ways to get your images afterward:

a. All photographers handle this part of the process differently, and how they handle it should be something discussed at the initial consultation to ensure that their way of doing business is in accordance with how you’d like to receive your images. The most popular ways include: an online gallery, DVD delivery, USB delivery, and direct download. Some photographers don’t include all of the images and you must purchase them afterward via an online gallery or a screening at the photographer’s office or studio.

4. What elements to ask your photographer to please photograph:

a. A good photographer won’t need to be asked to photograph certain details or people in your wedding. However, if there is something that you specifically worked very hard on or a certain relative that isn’t included in formal portraits that you’d like a picture of, make sure that you express this to your photographer prior to the wedding, so they can make this element a priority.

5. How much time should be allotted for portraits and when is it best to take these (before or after the ceremony or on a different day)?

a. All photographers find that different time periods work best for them, and there are about a million ways to do this! Personally, I find that taking all of the photographs before the ceremony saves a lot of time, stress, and money (you won’t need to have a cocktail hour). I often find that taking the photographs after the wedding causes couples to get antsy about going to the reception, so they can’t pay attention to each other because they’re uncomfortable having their guests waiting for them. Taking the pictures on a different day allows you more time, but not all photographers will do this free of charge as a different day requires a day out of their editing and/or shooting schedule.

6. What’s the best time of day for a wedding for the best photography?

a. This depends on the location and whether or not you’re doing the pictures before or after the ceremony. It also depends on the strengths/weaknesses of your photographer. Generally speaking and in my opinion, if the ceremony is outside with no shade, you’d like the ceremony to be held directly before sunset (with all pictures taken prior to the ceremony). At that time of day, there is a very beautiful, even light. During the direct sunlight part of the day, there will be a lot of harsh shadows under everyone’s faces, a very intense difference between areas of sun and areas of shadow, and a lot of unflattering squinting. If the ceremony is outside in an area with plenty of shade, you could have it early, but I’d advise that the closer you are to sunset and the farther away you are from high noon, the better your pictures will turn out. I advise on visiting the ceremony site at the time of day you’re planning on having the ceremony and observe where the sun is.

7. What is a reasonable amount of time to wait in order to get our pictures back?

a. This very much depends on the workflow, schedule, and demand of your photographer. It also depends on the season you’re getting married in. If you’re getting married in January, you may have your pictures back in a week. If you’re getting married in August, you may have your pictures back in a few months. Some photographers are busier than others, and some photographers can get things done faster than others despite their demand. In general, I’d say it’s very reasonable to wait anywhere from 1-3 months. That being said, your photographer should have a general idea on your wedding day of when the pictures should be completed. Don't be afraid to ask them or to ask that a time frame is outlined in your contract.

8. What is the fair amount to pay a photographer and what should I expect for the price?

a. Photography prices range anywhere from $500-$10,000+. Generally speaking, you get what you pay for. A full-time photographer who has been practicing for several years will charge from $2000-$8000. Despite common beliefs, photographers (and other wedding vendors) don’t charge high prices just because they can. It’s actually very formulaic for most professional vendors and includes the following overhead expenses and things you’re paying for behind the scenes such as: Equipment, website services, advertising, cost of products, travel, accounting services, time spent on consultations and post-production, the actual time spent photographing the wedding, medical, liability and equipment insurance, membership to professional organizations, and more. Some photographers include the high-res pictures, an album, and several prints in their wedding packages. Others charge this for their shooting time and require clients to pay afterward. How much you spend usually reflects how much of a priority photography is to you. Some wedding couples spend 1/3 of their budget or more on photography, while others spend 1/8th of their budget. I’d recommend sitting down with your fiancĂ© and discussing how important the photography is to you and coming up with a budget (and go on the hunt) shortly after you’ve secured a wedding date and venue.

Tuesday, January 3, 2012

A Card, Just Because


Are you and your fiancé stressed out with wedding planning? I remember when Joe and I were planning our wedding we would take turns freaking out about even the smallest of details. Especially as it got closer to our wedding day there was a lot of stress floating between us. If you are having one of these moments with your significant other, try cutting the tension with a card, just because. It'll help to remind the other person how much they mean to you and how happy you are to be marrying them especially, and even, through wedding stress.

I love this card by Christen Strang from Letter Happy. It's simple, cute, and to the point.


DIY Wedding Tutorial #1


Today we have a coffee-stained paper flower DIY tutorial made exclusively for us by guest contributor Courtney Rae Troup of Book Craft on Etsy.com. These flowers are a beautiful addition to a rustic or vintage wedding, and can be added into centerpieces, attached to wreaths, and can even be used on top of favor boxes. A big thank you to Courtney for this wonderful tutorial!

What You'll Need:
Five sheets of 8.5”x11” paper
About two cups of coffee
A pan large enough to fit the paper
A printer
A pair of scissors
A pencil
A hot glue gun
A paintbrush with a handle no bigger than a pencil or something similar
You will also need the petal template and the quote print out provided below:
(click each for a larger image that you can download to your computer)


Directions:
Step 1: Fill the pan with coffee then take a sheet of paper and dip about three inches of one side in it.

Step 2: Let it soak in the coffee for a minute or two before turning the paper to soak through the next side.

Step 3: After all four sides have soaked carefully submerge the rest of the paper into the coffee. Allow that piece to continue soaking while you repeat with the other four pieces. Let all five pieces soak for two hours.


Step 4: Lay out some paper towels. Carefully remove each sheet and spread them out on top of the towels to dry.

Step 5: Take another paper towel and pat each page to soak up some of the coffee, concentrating mainly in the center of the page, which will give the paper flower a nice deep color on the edge of its petals that will fade to a lighter color in the middle. The paper should take about an hour or two to dry.

Step 6: Once completely dry, make sure the ends of the paper are relatively flat or you may get a paper jam when you try to print the quote. If they aren’t flat place a few heavy books on top of them for an hour or two. Print the quote image on one side of each sheet of paper. You can also print out your wedding logo or any other phrase you would like.


Step 7: Now take one sheet and fold it in half with the quote side facing in. Fold it in half again so you have a small rectangle.

Step 8: Now locate the corner of the rectangle where the paper folds, then fold the rectangle in half diagonally to make a triangle, making sure that the corner forms the tip. There should be about an inch of paper sticking out from the triangle. The “tip” is the corner that is not touching that extra paper.

Step 9: Now take the petal template and place it on the triangle so the corner of the petal lines up with the tip of the triangle. Trace the petal stopping about an inch above the tip. Then cut out the petal shape, again stopping about an inch away from the tip.


Step 10: Unfold the paper and you should have one large 2-dimensional flower. Examine the petals to make sure they are all about the same length. If not, extend the cut. Repeat steps 7 – 10 with the other four sheets.

Step 11: Now, take one flower and extend the cut of one side of a petal all the way to the center as shown.

Step 12: Cut off the top and side of one of the petals on either side of the cut to create a tab.

Step 13: Using your glue stick cover the tab with glue, then take the petal on the other side of the cut and press it firmly on top of the tab until the glue dries. You now have the first layer of the flower.


Step 14: Take the next 2-D flower and this time cut one entire petal out. Set the one petal aside and then repeat steps 12 and 13 on the rest.

Step 15: Take the next flower and cut out two petals, make sure these two petals stay connected to each other, and set them aside. Cut three out of the next one and set them aside. When you get to the last flower cut it in half, save one half. Repeat steps 12 and 13 on all except for the petals you set aside.


Step 16: Now, take that one petal and curl it with the paint brush handle, making sure the writing is facing out. Then uncurl it just a tad.

Step 17: Now for the tricky part: Take the two petals cut out and curl one of the petals. Beginning on one side at a slight angle, curl the petal towards the other petal making sure the writing is facing out. Don’t uncurl this part at all; make sure it stays in a nice little tube. Then curl the other petal the same way as step 16. Carefully fold that petal around the tube like petal; press and crease just the end. Then unfold part of the way, add some glue, fold back, and press firmly until the glue dries.

Step 18: Now take the three petal cut out. Repeat steps 12 and 13 on it. Then curl both petals like in step 16. Repeat step 16 on the rest of the flower’s layers.


Step 19: Now take the largest flower layer (7 petals) and using your glue gun, place some glue in the center. Then carefully add the next biggest layer (6 petals) on top, arranging it so that the six petals cover up as many of the spaces between the petals. Use the tip of the paint brush handle to press down in the center until the glue dries. Then repeat with the rest until you reach the layer with three petals.


Step 20: Once you have glued in the layer with three petals and it has dried, start pulling apart the petals that have overlapped and re-curl or uncurl as needed.

Step 21: Once the petals look about the way you want them to, glue in the layer with two petals.

Step 22: Add in the center layer (the one with the tube-like petal), push down as firmly as you can without smashing the center and before the glue dries all the way look for a spot on top that looks like it needs an extra petal and gently place the last petal there. Set the flower aside to finish drying and… You’re done!


p.s. For a chance to win one of Courtney's paper flowers, enter our launch bulk giveaway here!

Related Posts Plugin for WordPress, Blogger...