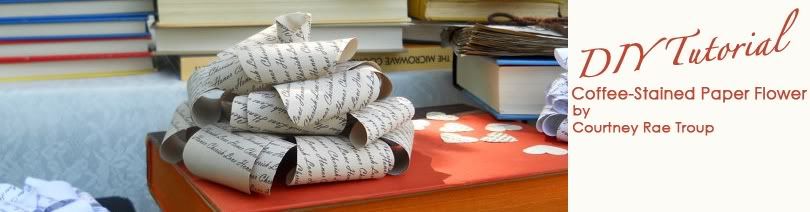
Today we have a coffee-stained paper flower DIY tutorial made exclusively for us by guest contributor Courtney Rae Troup of Book Craft on Etsy.com. These flowers are a beautiful addition to a rustic or vintage wedding, and can be added into centerpieces, attached to wreaths, and can even be used on top of favor boxes. A big thank you to Courtney for this wonderful tutorial!
What You'll Need:
Five sheets of 8.5”x11” paper
About two cups of coffee
A pan large enough to fit the paper
A printer
A pair of scissors
A pencil
A hot glue gun
A paintbrush with a handle no bigger than a pencil or something similar
You will also need the petal template and the quote print out provided below:
(click each for a larger image that you can download to your computer)


Directions:
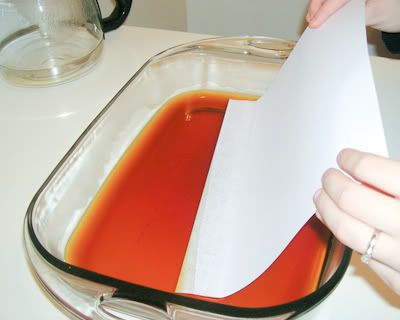
Step 1: Fill the pan with coffee then take a sheet of paper and dip about three inches of one side in it.
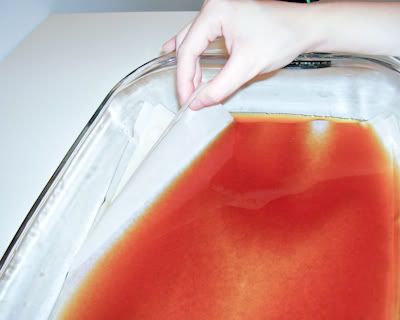
Step 2: Let it soak in the coffee for a minute or two before turning the paper to soak through the next side.
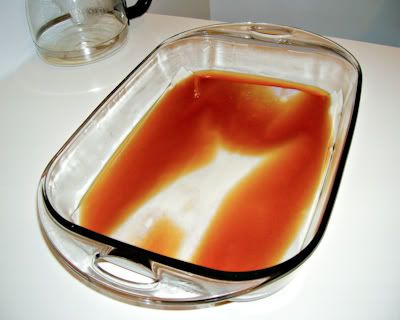
Step 3: After all four sides have soaked carefully submerge the rest of the paper into the coffee. Allow that piece to continue soaking while you repeat with the other four pieces. Let all five pieces soak for two hours.
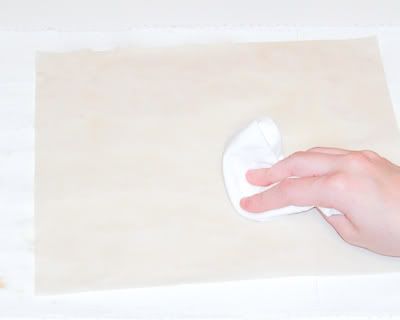
Step 4: Lay out some paper towels. Carefully remove each sheet and spread them out on top of the towels to dry.
Step 5: Take another paper towel and pat each page to soak up some of the coffee, concentrating mainly in the center of the page, which will give the paper flower a nice deep color on the edge of its petals that will fade to a lighter color in the middle. The paper should take about an hour or two to dry.
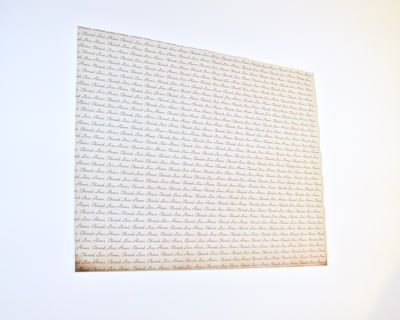
Step 6: Once completely dry, make sure the ends of the paper are relatively flat or you may get a paper jam when you try to print the quote. If they aren’t flat place a few heavy books on top of them for an hour or two. Print the quote image on one side of each sheet of paper. You can also print out your wedding logo or any other phrase you would like.

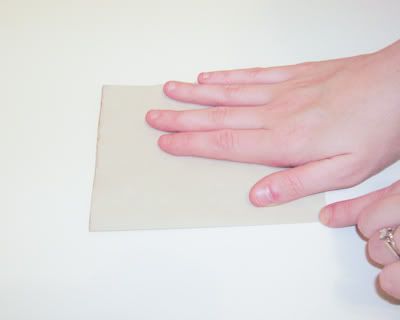
Step 7: Now take one sheet and fold it in half with the quote side facing in. Fold it in half again so you have a small rectangle.
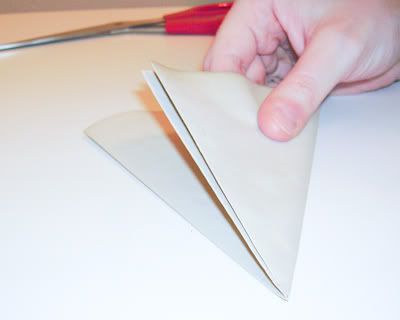
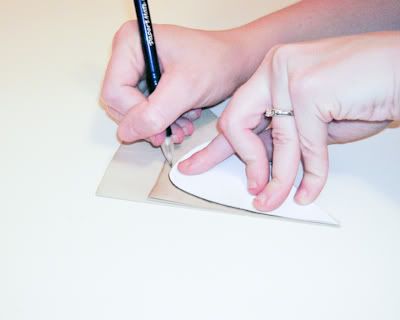
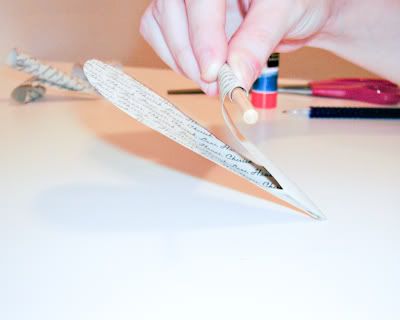
Step 8: Now locate the corner of the rectangle where the paper folds, then fold the rectangle in half diagonally to make a triangle, making sure that the corner forms the tip. There should be about an inch of paper sticking out from the triangle. The “tip” is the corner that is not touching that extra paper.
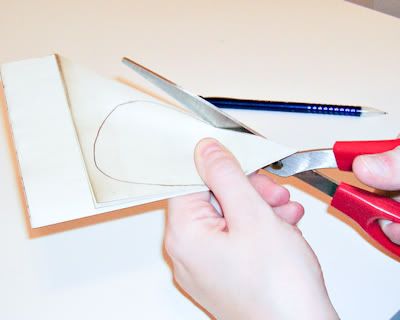
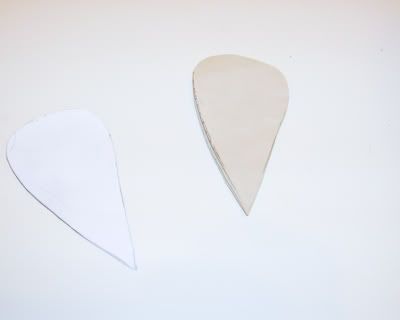
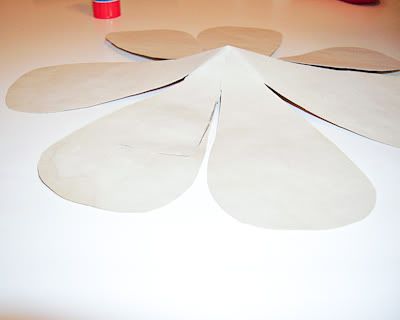
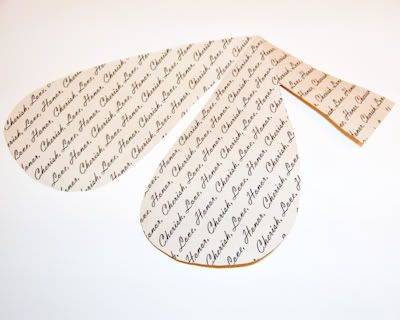
Step 9: Now take the petal template and place it on the triangle so the corner of the petal lines up with the tip of the triangle. Trace the petal stopping about an inch above the tip. Then cut out the petal shape, again stopping about an inch away from the tip.
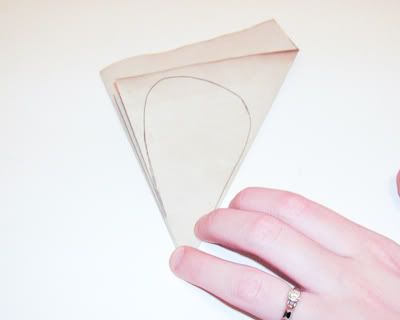
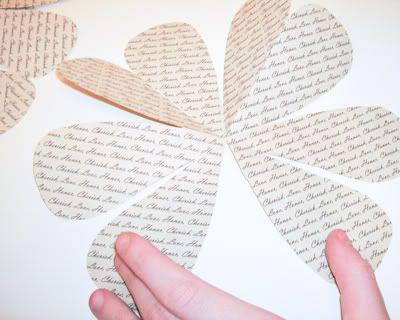
Step 10: Unfold the paper and you should have one large 2-dimensional flower. Examine the petals to make sure they are all about the same length. If not, extend the cut. Repeat steps 7 – 10 with the other four sheets.
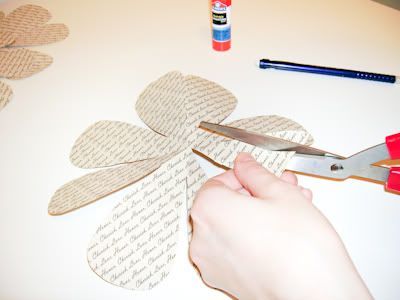
Step 11: Now, take one flower and extend the cut of one side of a petal all the way to the center as shown.
Step 12: Cut off the top and side of one of the petals on either side of the cut to create a tab.
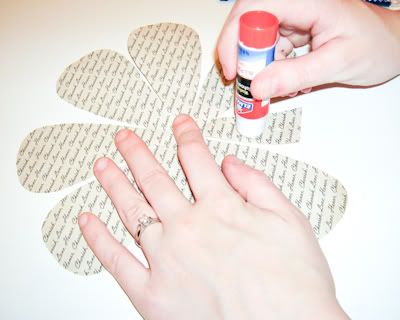
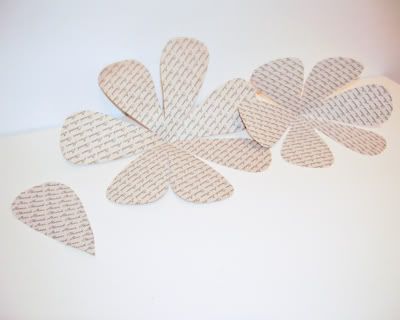
Step 13: Using your glue stick cover the tab with glue, then take the petal on the other side of the cut and press it firmly on top of the tab until the glue dries. You now have the first layer of the flower.

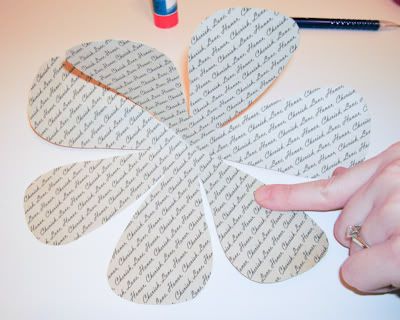
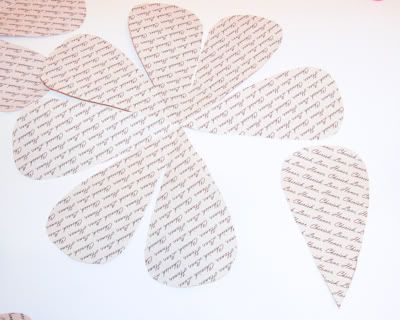
Step 14: Take the next 2-D flower and this time cut one entire petal out. Set the one petal aside and then repeat steps 12 and 13 on the rest.
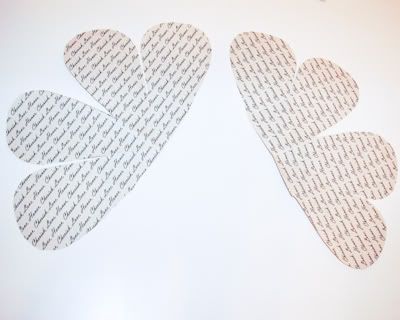
Step 15: Take the next flower and cut out two petals, make sure these two petals stay connected to each other, and set them aside. Cut three out of the next one and set them aside. When you get to the last flower cut it in half, save one half. Repeat steps 12 and 13 on all except for the petals you set aside.
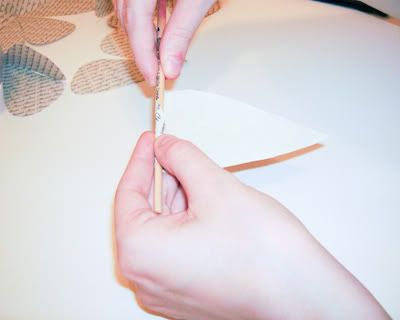
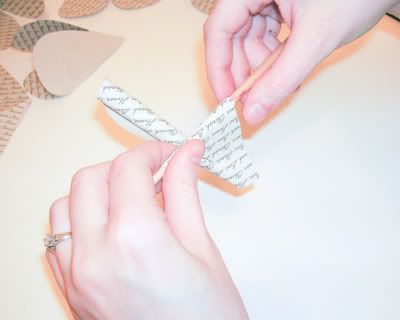
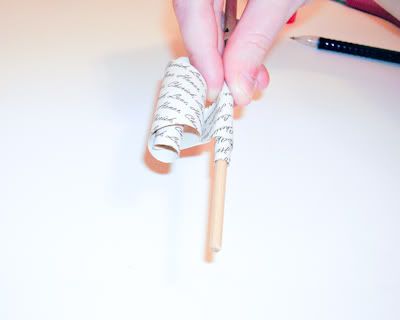
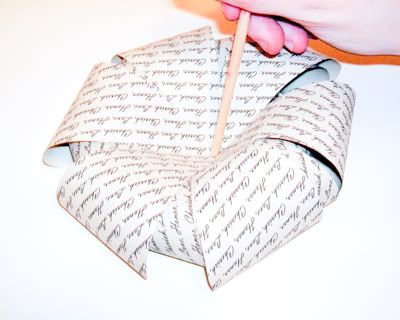
Step 16: Now, take that one petal and curl it with the paint brush handle, making sure the writing is facing out. Then uncurl it just a tad.
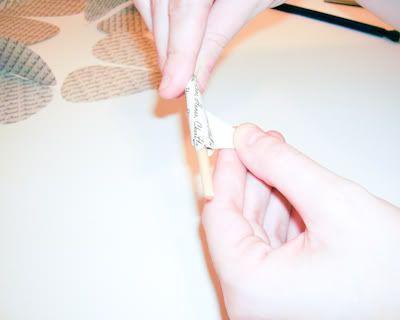
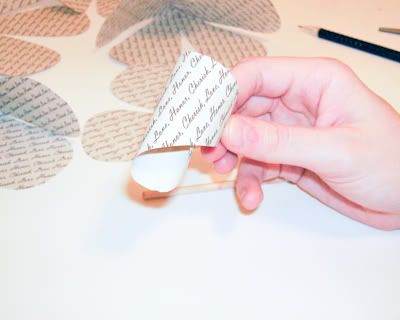
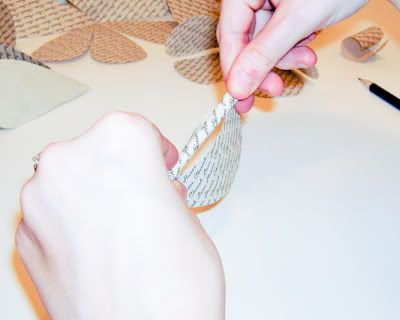
Step 17: Now for the tricky part: Take the two petals cut out and curl one of the petals. Beginning on one side at a slight angle, curl the petal towards the other petal making sure the writing is facing out. Don’t uncurl this part at all; make sure it stays in a nice little tube. Then curl the other petal the same way as step 16. Carefully fold that petal around the tube like petal; press and crease just the end. Then unfold part of the way, add some glue, fold back, and press firmly until the glue dries.
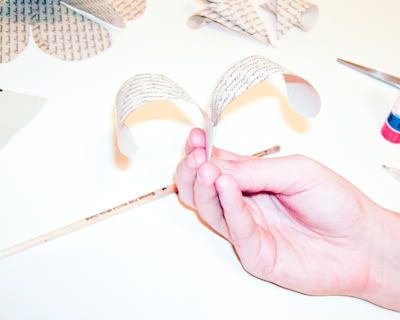
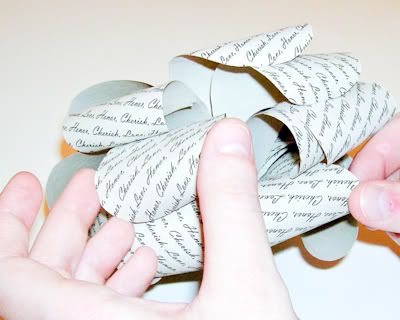
Step 18: Now take the three petal cut out. Repeat steps 12 and 13 on it. Then curl both petals like in step 16. Repeat step 16 on the rest of the flower’s layers.
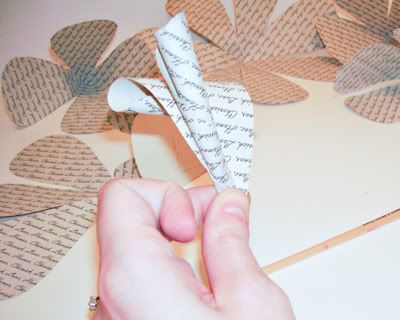

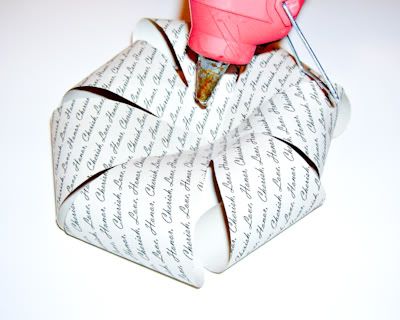
Step 19: Now take the largest flower layer (7 petals) and using your glue gun, place some glue in the center. Then carefully add the next biggest layer (6 petals) on top, arranging it so that the six petals cover up as many of the spaces between the petals. Use the tip of the paint brush handle to press down in the center until the glue dries. Then repeat with the rest until you reach the layer with three petals.
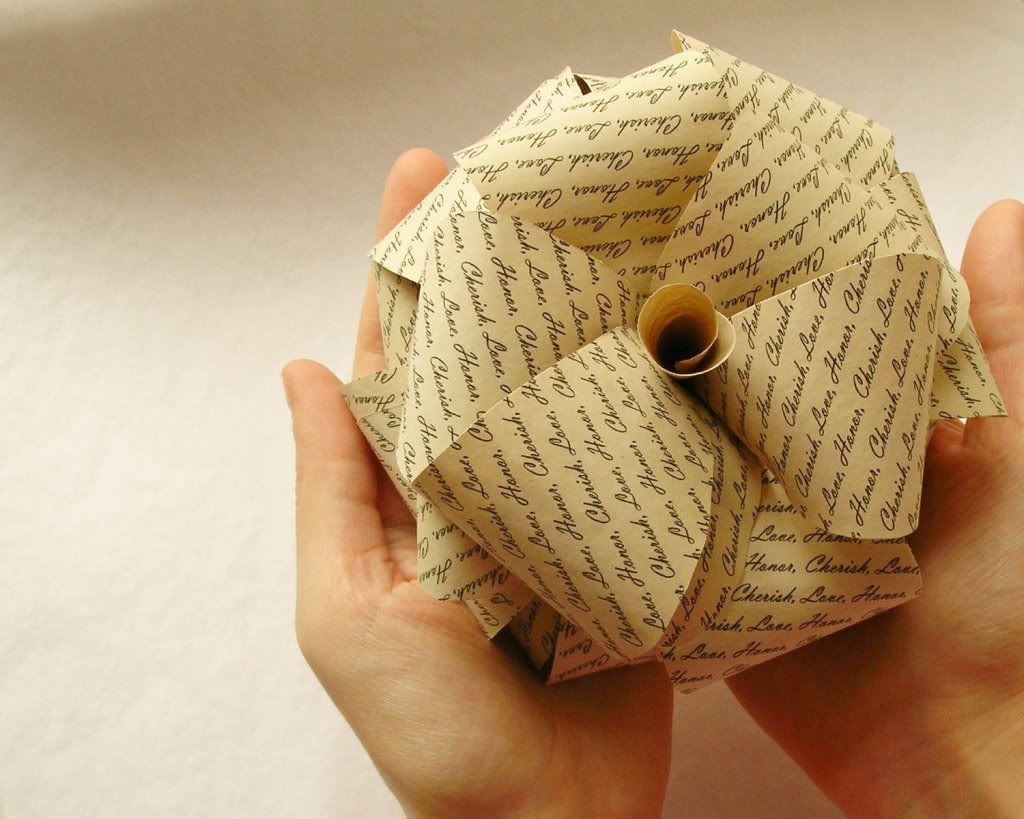
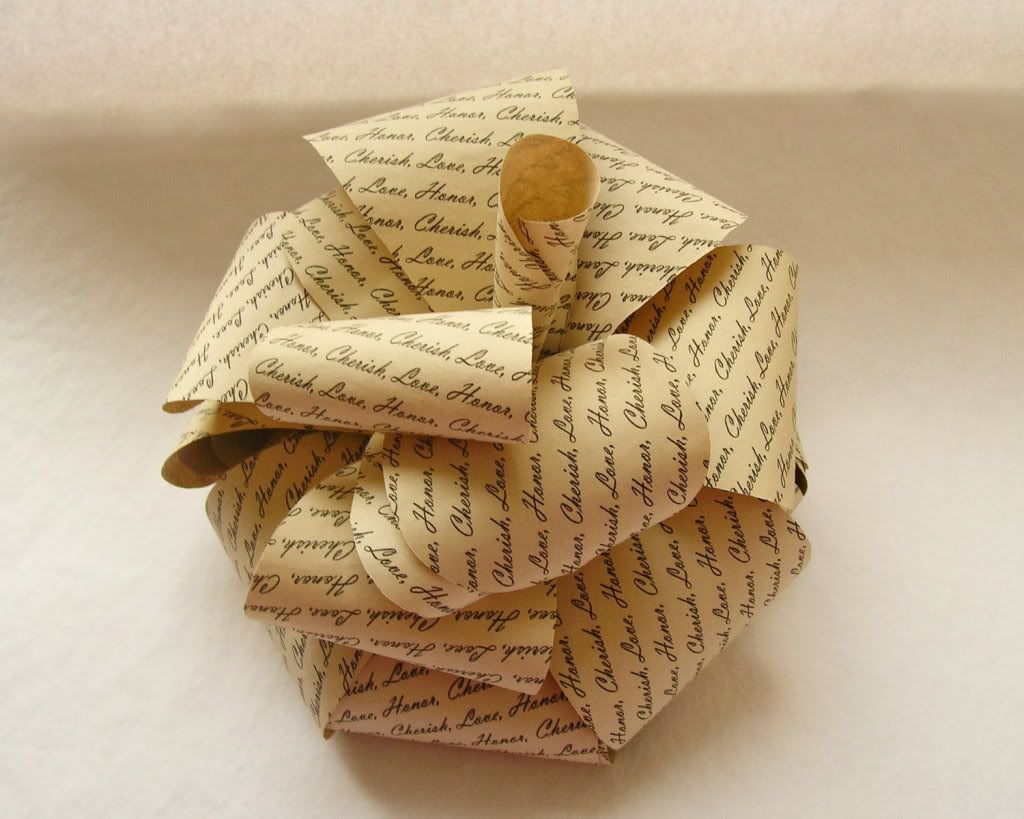
Step 20: Once you have glued in the layer with three petals and it has dried, start pulling apart the petals that have overlapped and re-curl or uncurl as needed.
Step 21: Once the petals look about the way you want them to, glue in the layer with two petals.
Step 22: Add in the center layer (the one with the tube-like petal), push down as firmly as you can without smashing the center and before the glue dries all the way look for a spot on top that looks like it needs an extra petal and gently place the last petal there. Set the flower aside to finish drying and… You’re done!
p.s. For a chance to win one of Courtney's paper flowers, enter our launch bulk giveaway here!

Unique Wedding Favors

Tuesday, January 3, 2012
DIY Wedding Tutorial #1
Subscribe to:
Post Comments (Atom)
No comments:
Post a Comment